Stop by Lizzy Lynece!

Sunday, June 27, 2010

Flap closure pillow

While in church...(awful, I know!) I finally figured out how to make an envelope-ish, non zipper pillow. I took my final scraps of muslin left over from the shower curtain and went to work. I think it is the easiest pillow I have made so far. And the best part? No hand sewing at the end!

I first laid out the pillow on the scrap. You'll notice I had to sew extra pieces on the ends to make it big enough. My pillow form was 19"x19" so I made the length 20" to allow for the seams and the width about 46". Just double the pillow width and add about 8" for the flaps that will overlap to hold the pillow in.

I wanted to give the pillow more flare so I randomly cut diagonal strips down the center of the pillow. I sewed the strips with the seams facing out to give it more texture.
When you are ready to sew the pillow case together, hem the the lose edges of the short ends and then fold each end toward the center. I folded them on top of the pillow first and marked where the two ends would meet on the overlap.
Pin everything together on the two open ends and head over to the sewing machine.
Sew down both ends, strait over the flaps and everything. Once sewn, flip that bad boy right side out and stuff the pillow in. I pressed my seams down at the end to make them stand out more.


Here is the flap. I lucked out and used the seared ends of the fabric so I didn't need to sew a hem to close any raw edges.

Join  us Saturdays at tatertotsandjello.com for the weekend wrap up    party!

Thursday, June 24, 2010

Rosette Headbands

My two older sisters constantly spoil my little niece, so I figured I better send her something. I think the huge flower headbands are the cutest thing for little girls and I wanted to make her a version that is a little different. To make the actual flower I found a tutorial online and the best part is that you can make the whole thing without sewing...so break out that glue gun!

After making the flowers you can glue beads or buttons on for an extra touch...I was going for girly, so I had to include some beads. The last step was to attach a snap clip on the back so that my sister could change out the rosettes. I covered the clip with felt just to make it more comfortable on her head. And that's that! Now she has some cute girly headbands to wear with all of her cute outfits!


As of right now I have no baby's head to model the headbands on, so I decided that this candle would do just fine. It loved the spotlight.


Monday, June 21, 2010

I'm not being lazy...promise!

Here are some tid-bits of things I have been working on. There are about 3 different projects I have going including my sister's birthday present. Hopefully I will finish all of them up by the end of the week.

The suspense is just killing you, isn't it?

Sunday, June 20, 2010

Light Fixture to Candle Holder

I thought it would be a waste to toss a perfectly good light fixture, so after taking it down I thought it might make a pretty good candle holder. First I cleaned and sanded all of the metal pieces so that the spray paint would stick better. Next I gave it a couple coats of oil rubbed bronze spray paint. I flipped over the light bulb holders so that the spiky parts inside stuck up and hot glued them to the base. After the fact I realized that epoxy would have probably worked better. But the glue will do. It needed something extra so I added ribbon to each edge, and...ta-da...brand new candle holder!


Bathroom Re-Do (06.03.10)

Instead of folding the laundry, like I should be, I wanted to post a few pictures of my newly re-done guest bathroom. The make over has quickly made it one of my favorite rooms in the house. I sort of wish I had done it in the master bath instead. I got the inspiration from a show in HGTV (I can't remember which one, I watch that channel for hours on end sometimes) but they were re-doing a deck to make it an outside bedroom. They used a deep gray and wood accents and I fell in love. I had been trying to work with a shower curtain I had already purchased but couldn't find a color that would go with it. So I nixed the curtain and started from scratch. Once I had my color, gray, I then found a shower curtain on one of the many craft blogs I stalk, and the wheels started turning. I wanted to do a "spa-like" theme. Not a cheesy one with shells and candles galore, but a toned down classy spa theme. The finished project turned out just how I had imagined it in my head, which is always an accomplishment, and I love it!

Before.

After!

I went ahead and took a chance and painted the molding too.

Jordan switched out the light fixture and we got rid of the apartment-ish one.

And that chrome apatment-ish light fixture got a fresh coat of paint and a new life as a candle holder for the back of the toilet.

My mom worked her little fingers to the bone to make this beautiful ruffled shower curtain for me. Who knew muslin would be such as pain to work with??

Another idea I grabbed from a blog that grabbed it from pottery barn. Numbered jars with the essentials for guests, cotton balls and Q-tips. And some sea shells from Cancun.

The finishing touch to the bathroom. A Book Page Wreath and wall art that I actually thought up all on my own. No stealing from blogs this time!

Up close and personal.
So that's the tour of the new bathroom folks

Thrift Store Dress Make Over (05.02.10)

I had my friend Lauren's wedding coming up and I wanted to get a new dress for the occasion. So I stuck with my challenge to only buy dresses from the thrift stores and give them a face lift. I didn't put an end on this challenge...it may last a few months or forever...who knows, but I love getting a good deal! So this little beauty was equipped with shoulder pads and a high neck. The makings of all fabulous dresses, right? What sold me was the pleated skirt and drop waist. I immediately saw the potential.
The shoulder pads of course had to go. I really think they made the dress a good inch or two longer just by removing them!
After the shoulder pad surgery the dress was still a little too short. Probably because it was a petite size, and I am anything but. I took out the hem and put in a smaller one so that it was a more appropriate length. The sides needed to be taken in and I decided to make the sleeves shorter to make it less of a grandma-ish dress. To get rid of the high neck I unbuttoned the top button and pinned it back to make a v-neck. Once it was washed it was ready for the wedding.

Key Holder (04.20.10)

I have to say I thought of this one all on my own this time. We had a bunch of scrap chair-rail left over that I figured would work great for a key holder. I got out my burgundy craft paint and went to work.
Once the paint dried I screwed in some little hooks I once used to hang my jewelry. The project got a little delayed because even though I measured, one hook ended up way higher than all the rest. No worries though, a little wood filler, sanding, and some new paint made it all better. I bought some ribbon, letters, and scrapbook paper to make the rest. I hung it up for the housewarming party as is, and while in church the next day I kept thinking it was missing something. I'm a sinner, I know. Jordan had some twine from camping or something so I made some bows and winded some around the letters. And finally it was all done. Now that I'm thinking about it, I should probably try to make a necklace holder with the other chair-rail scraps and hooks...

House Make Over (04.04.10)

House 040410
WARNING: There are a lot of pictures below!
Now that that is out of the way, onto the latest news. My sister Dana came in from Texas to help me decorate the new pad. There was a lot to be done, some final unpacking, painting, and organizing.
So here is the tour. The entry way got a little face-lift with some wall art and newly painted bucket from a local consignment shop. The stand is actually our old tv stand that we bought for like $7 at a thrift store. All it needed was some updated paint.
Here was the before of the cabinet >


So here is our living room, Dana and I replaced throw pillows and added wall art that was actually painted by her. It makes things a lot cheaper when your sister is really artistic.
Here is another part of the living room and entry.
And a final picture of the living room with Jordan hanging out on the couch.
Here is the Dining room, with my new place mats from Dana and Alicia.
The collage of us. Because we are that awseome. haha.
So the guest room was pretty much done by the time Dana got here. We added the art above the bed and re-did a lamp and nightstand to put in the room. By the way, stenciling is a super easy way to whip up some art.
When we were at the consignment shop we found these vintage handkerchiefs and thought they'd go great in the guest room. So I framed them in a dollar store find that we painted white. I love a good deal!
The lamp we painted from brown to white to go a little better with the room. I'll probably replace or jazz up the shade at some point. And the nightstand...oh the nightstand. I wish I had a before picture, but it was awful! It was dark wood that was all beat up and scratched with a water stained oriental fabric top that was placed under glass that did not come out. I didn't want to buy a nightstand because they are kind of expensive so I painted it a semi-gloss white and then Mod Podged scrapbook paper over the glass and then put a couple more coats over the paper to make it water resistant. I think it turned out looking a 100 times better than it did.
The office is a little sad, but at least it has an extra bed for any visitors...hint hint!
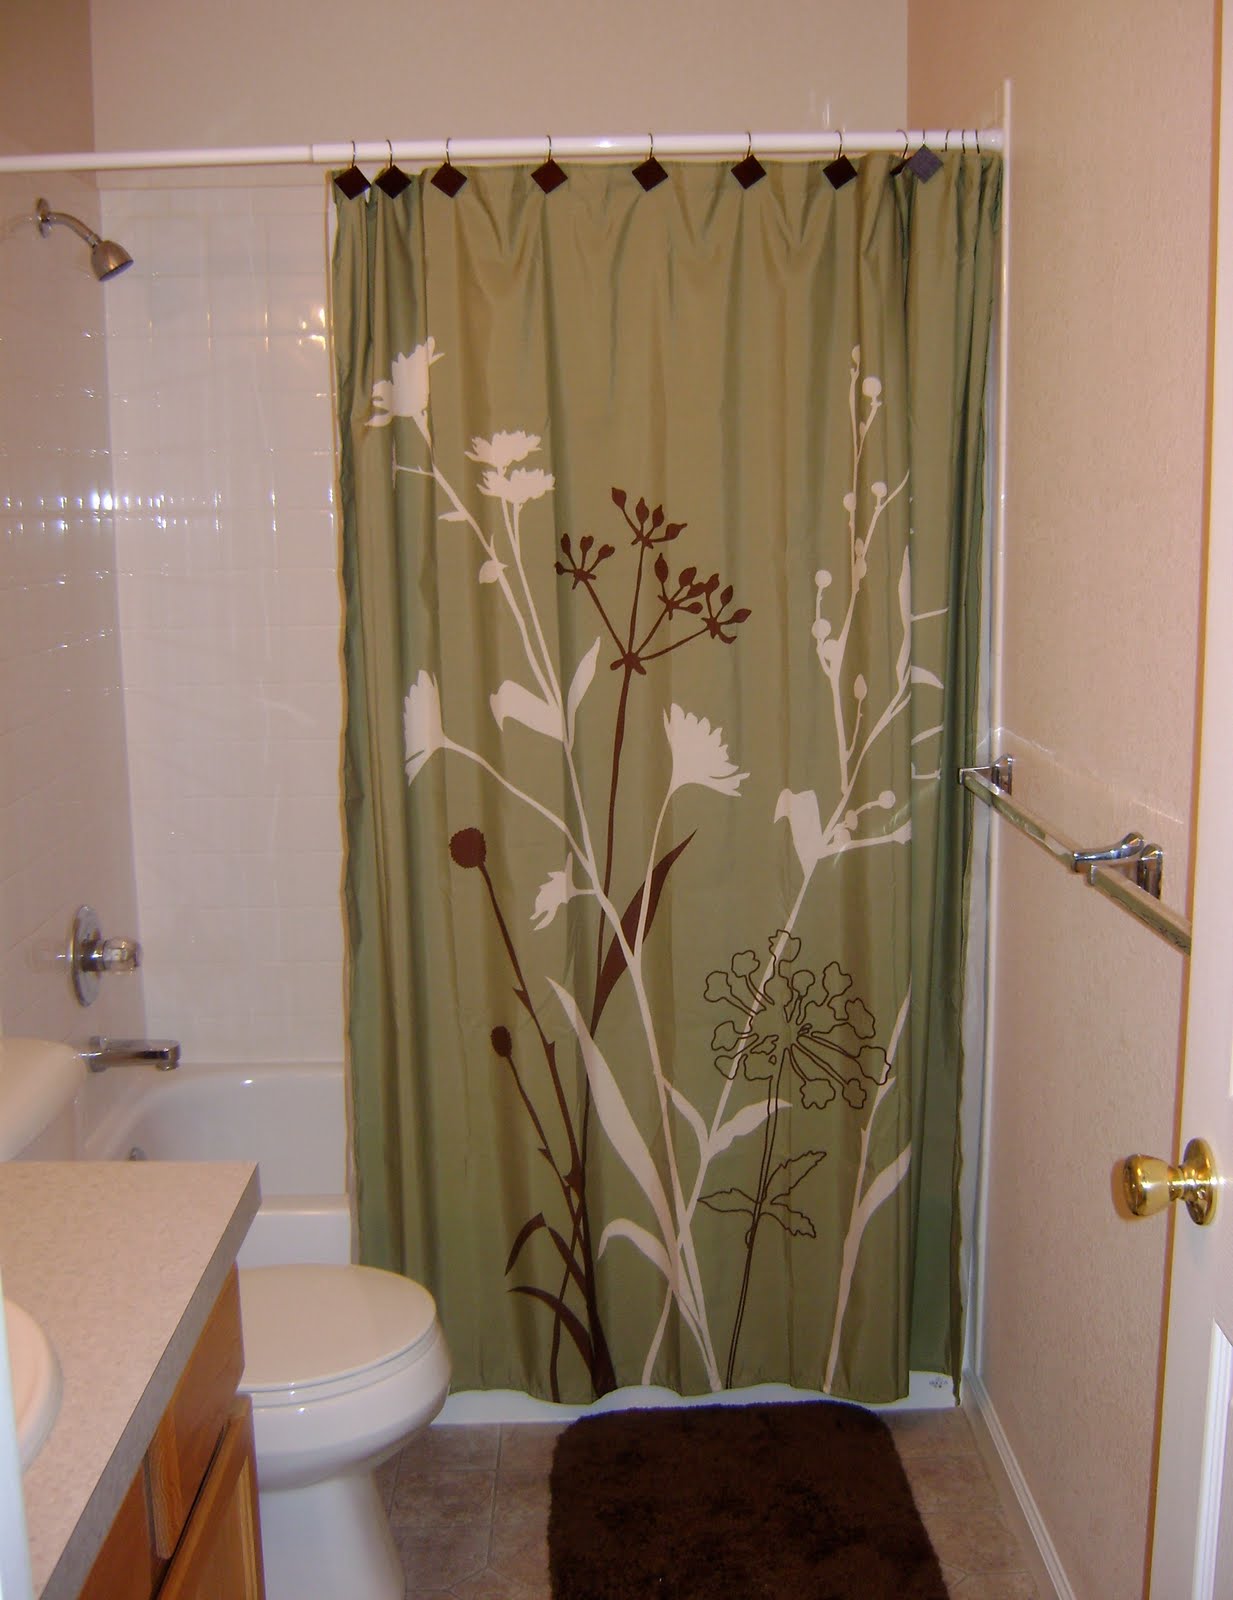
Here is the lovely master bedroom.
Since we don't have a headboard up I wanted to hang something above the bed. I chose to make these Subway Signs from Tatertots & Jello. They didn't quite turn out as I wanted so I dry brushed some paint over them to help cover up imperfections an give them a little more of a distressed look.
And finally the kitchen. It's so nice to have counter space and not to always bump into Jordan or ask him to move when we are trying to cook together. We even took advantage of the new space and made Easter dinner for my sister.


So there you have it folks, there is our new house. Next up on the agenda is a fence for the back and maybe a puppy.

LinkWithin

Related Posts with Thumbnails