Stop by Lizzy Lynece!

Showing posts with label home decor. Show all posts

Friday, October 8, 2010

Thrifty Seasonal Decor: Part 2, Fall

The other day browsing around on my favorites list, I saw this awesome idea at Oops, I Craft My Pants, and immediately swiped the idea! I too made the trip to Home Depot and smuggled out a handful of paint chips in fall colors. The best part about this project is that it was FREE! Well almost, I did have to get a new Sharpie for the tree trunk, but other than that...paint chips-Free, and MDF-Free (sitting in my garage from a headboard).

I drew out the tree trunk and then got to gluing. You'll probably notice I yanked off one of the falling leaves, seemed like a little much so it had to go. It's one of my favorite fall projects yet.


**You'll be seeing this here.

Thrifty Seasonal Decor: Part 1, Halloween

I finally dragged out all of my Halloween and fall decor and got to work. I soon realized that all of the decorations that seemed to almost overpower our little apartment last year now seem sparse in our house. To add some quick Halloween flair I printed out some vintage Halloween prints and placed them in frames around the family room. Here are just a couple.


Wednesday, October 6, 2010

Halloween Decor

My husband and I took a trip to Texas to visit my family. While I was there my sister was putting out just SOME of her Halloween decorations. She goes all out for the holiday. Here is a glimpse of her mantle, kitchen table, and dining room table. Closer to Halloween you will find a graveyard in the front yard and creepy silhouettes of cats, ghosts, mice, spiders, and even the outlines of Gothic window treatments in her windows. My next Halloween craft will be the silhouettes to place in our front window. It's about time for me to get into the spooky spirit!


Sunday, August 29, 2010

Book Page Topiary

I wanted to craft something on my day off, but being that it was my day off I didn't really want to leave the house. So I rummaged through my craft stash and found the awesome buckets I got on sale at TJ Maxx about a month ago. The wheels started turning and I grabbed a garage sale book, Styrofoam balls, which I don't even know why I had them, skewers and paint.


look at that awesome sale price!

I bought the buckets for the tag on the front, but 7 means nothing to me, so they would undergo a change. I gave the buckets a coat of blue craft paint. Spray paint would have worked better, but again I was not leaving the house, and blue spray paint was not in my cupboard.

Then came the time consuming part. Pull out pages, accordion fold, fold in half, repeat. Til I had a huge pile. Or so I thought. That pile you see was barely enough for one ball. So...back to pull out pages, accordion fold, fold in half, repeat.


After hot gluing on the pages it looked pretty sad. I started to think this was a total waste of time. But I pressed on and continued to fill in the gaps and tried to "make it work," as Tim Gunn would say.

Once I was finally done gluing and folding, I mod podged some scrapbook paper over the number tags, stuck a skewer in the ball and put it through the cardboard barrier I put in the bucket. To cover the cardboard I made a big rosette and called it good. The book-page topiary's now have a place on the tv stand.


*you'll probably see this here and there.


Tuesday, August 3, 2010

Subway Signs

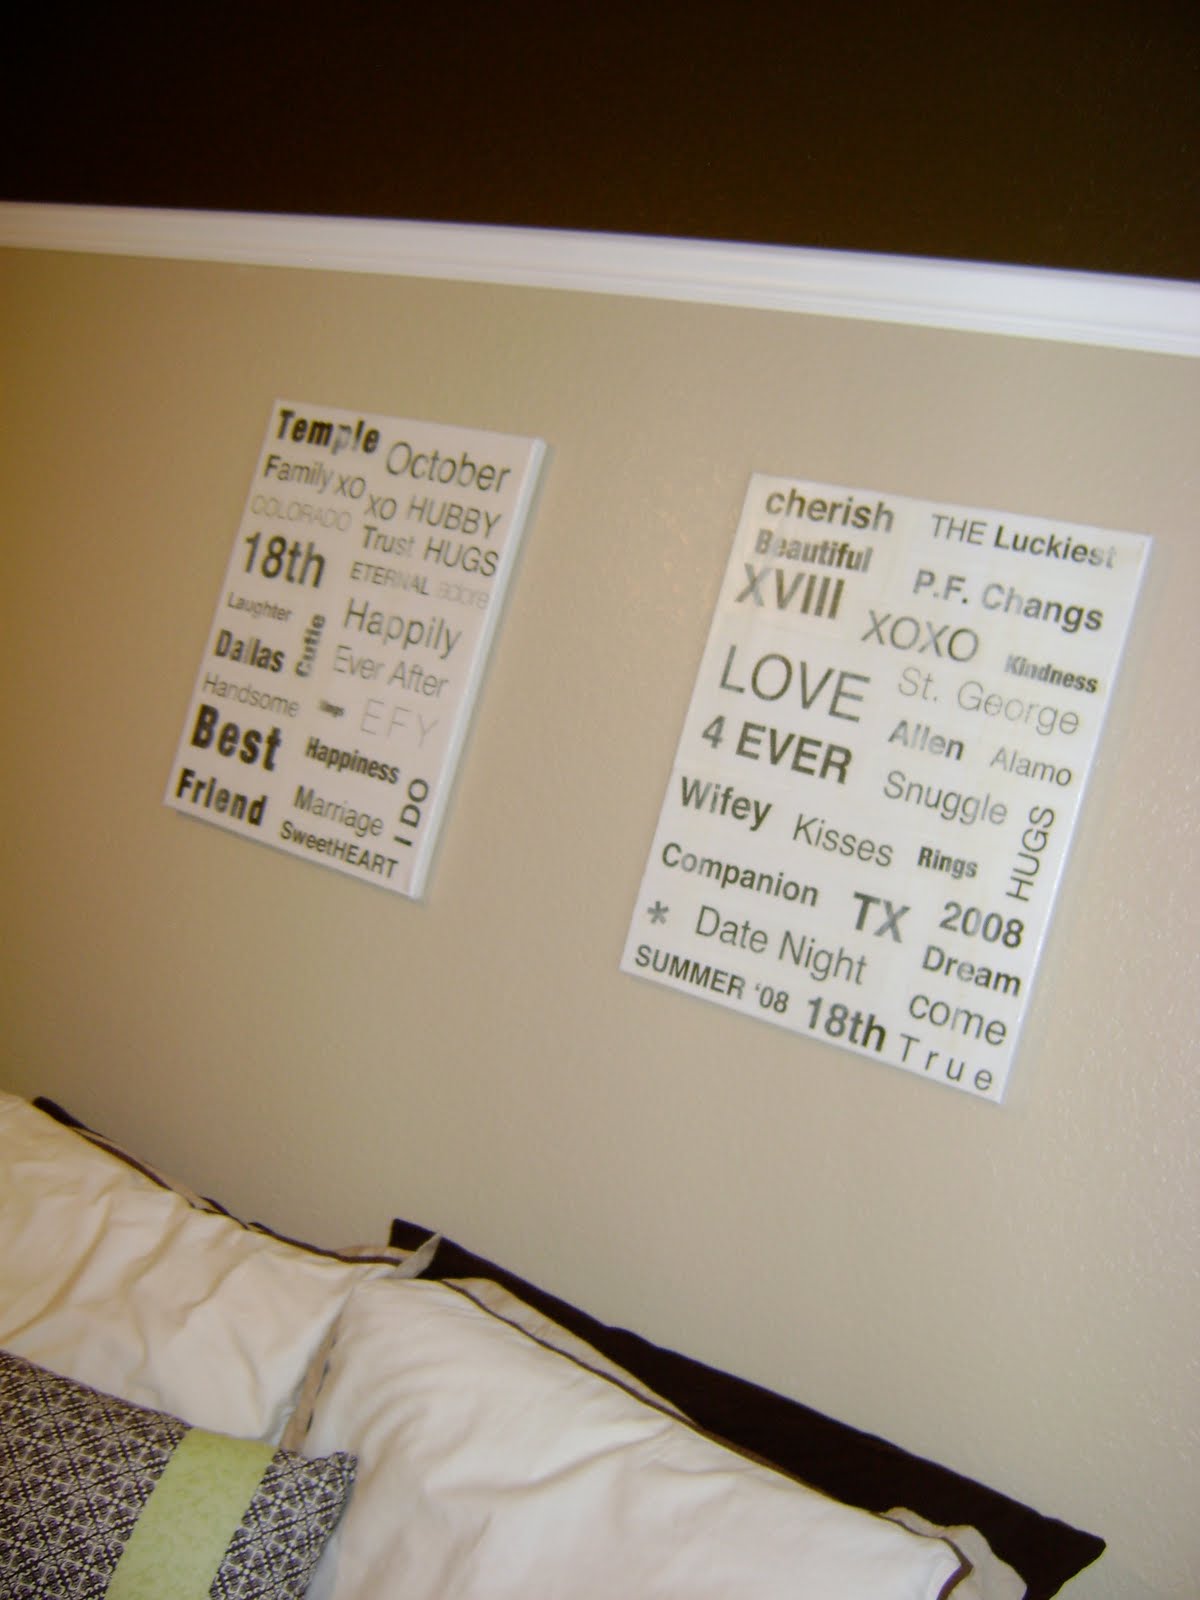
I originally found the idea for Subway Sign Art on Tatertots & Jello and just had to make some for our master bedroom. I used words that described husband & wife, and little sayings, songs, and places that were important to us.

My method involved printing out the words using Helvetica font on my printer. I painted a canvas white and mod podged the on the word strips. I then put a couple coats of mod podge over the word strips to seal everything. I ended up with a lot of bubbles and I didn't like how I could see the edges of the paper against the canvas. To hide those I took tan craft paint and dry brushed over the entire canvas. It ended up giving it a distressed look that I loved.


I'll be linking this up to the Subway Art Party @ Tatertots & Jello

Monday, July 12, 2010

Finishing Touches

It is amazing what a little bit of ribbon can do...


Here are my sad, plain towels in the guest bathroom


And with just a couple cuts of ribbon, my towels have new life in them. Plus, as my hubby commented, "now guests know not to use them." My thoughts exactly.


Saturday, July 3, 2010

Can't leave well enough alone

So the pillow cover I made last week was lacking something, at least to me. I made some fabric rosettes and leaves to hot glue onto the corner. Now it has a home on the guest bed where I will finally leave it alone.


Sunday, June 27, 2010

Flap closure pillow

While in church...(awful, I know!) I finally figured out how to make an envelope-ish, non zipper pillow. I took my final scraps of muslin left over from the shower curtain and went to work. I think it is the easiest pillow I have made so far. And the best part? No hand sewing at the end!

I first laid out the pillow on the scrap. You'll notice I had to sew extra pieces on the ends to make it big enough. My pillow form was 19"x19" so I made the length 20" to allow for the seams and the width about 46". Just double the pillow width and add about 8" for the flaps that will overlap to hold the pillow in.

I wanted to give the pillow more flare so I randomly cut diagonal strips down the center of the pillow. I sewed the strips with the seams facing out to give it more texture.
When you are ready to sew the pillow case together, hem the the lose edges of the short ends and then fold each end toward the center. I folded them on top of the pillow first and marked where the two ends would meet on the overlap.
Pin everything together on the two open ends and head over to the sewing machine.
Sew down both ends, strait over the flaps and everything. Once sewn, flip that bad boy right side out and stuff the pillow in. I pressed my seams down at the end to make them stand out more.


Here is the flap. I lucked out and used the seared ends of the fabric so I didn't need to sew a hem to close any raw edges.

Join  us Saturdays at tatertotsandjello.com for the weekend wrap up    party!

Sunday, June 20, 2010

Light Fixture to Candle Holder

I thought it would be a waste to toss a perfectly good light fixture, so after taking it down I thought it might make a pretty good candle holder. First I cleaned and sanded all of the metal pieces so that the spray paint would stick better. Next I gave it a couple coats of oil rubbed bronze spray paint. I flipped over the light bulb holders so that the spiky parts inside stuck up and hot glued them to the base. After the fact I realized that epoxy would have probably worked better. But the glue will do. It needed something extra so I added ribbon to each edge, and...ta-da...brand new candle holder!


LinkWithin

Related Posts with Thumbnails